Thursday, 8 August 2019

Saving our planet: making a reusable bread bag

Instead of buying loaves of bread wrapped in plastic from the supermarket, it is possible to go to a Bakery and buy loose loaves of bread which can be placed directly into a fabric bread bag. I used a plastic bread bag as a basis for the pattern for this bag. It can also be used to store homemade bread.


First cut two pieces of fabric, each being 20" (52 cms) long and 11" (28 cms) wide. This includes seam allowances.

Then prepare applique letters spelling "bread" the same way as was done for the Rolls Bag, but iron them on with the edge of the "b" letter 4" (10 cms) from the base of the bag, and the bottom of the letters 4.5 " (11.5 cms) from the side of the bag.


The directions for putting letters onto the Rolls Bag can be found here:
Rolls Bag

Using a half inch (1.5 cm) seam, sew across the bottom of the bag, right sides together, and then neaten with an over-locker or zig-zag stitch.


Mark 4" (10 cms) up from bottom of bag on each side and sew a half inch (1.5 cms) seam, from the top of each side, to the marker. Don't neaten these seams at this stage.

Align the base/ bottom edge seam with the end of the sew side seam (at the marker).

Then fold down so that the base seam is caught between the side seams:

Sew the end of the seam from the marker to the base of the bag, then neaten the whole of the side seam by over-locking or zig-zagging. Repeat this whole process for the other side of the bag.

Turn the bag right side out. There will now be a flap on each seam at the base of the bag.

To make the casing, cut two pieces of fabric 2" (5 cms) wide and 1" (2.5 cms) longer than the width of the bread bag. Fold each end in about half an inch (1 cm) and iron down. Then fold each piece of casing in half along the long edges, open out and then fold each side into the centre and iron down. Now sew these 3" (8 cms) down from the top of the bag, with one on each side and with ends meeting at the seam lines. 

Turn a double hem over at the top of the bag and sew.


Cut two pieces of cord about 31" (80 cms) long and thread through the casing as for the Rolls Bag.

Have fun with different colour combinations for the letters and casings. This is a good way to use up fabric scraps!


Remember: The secret of change is to focus all your energy, not on fighting the old, but on building the new. Socrates. 


Monday, 22 July 2019

Lessons from the river

On our final leg along the Murrumbidgee River, as well as learning from the Red Gum forests, the River itself has many lessons to teach. These are some of them:

The course of life is never straight, but it moves us on from the past towards a future
 we cannot see.


Every bend on the journey brings something new.


There is always hope when life seems dark, if we take the time to look outwards for it.


Sometimes the old needs to make way for the new.


Remnants of the past will remain, despite the new.


After times of trauma, debris will remain.


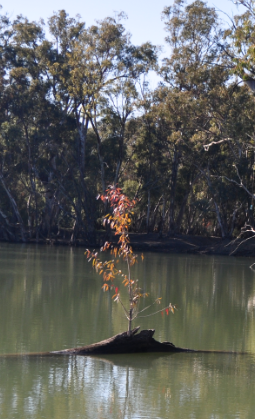
The "islands" on our journey can be places of respite and the beginning of new growth.


Nurturing brings new life.


We can try to own our lives, but we can never totally control the journey.


Too much of a good thing may kill parts of us, but beauty of character results.


Just as erosion is needed for beaches to form, so erosion from parts of our lives allows new aspects to form.


Remember: Have faith in your journey. everything had to happen exactly as it did to get you where you're going next! Mandy Hale


Thursday, 4 July 2019

Saving our planet: making reusable bags for bread rolls

I have used this bag (and previously, produce bags) at Bakeries, when buying bread rolls for our lunches when we are travelling, and have always had a positive reaction from staff (it saves their overhead costs too).


To make the bag I used unbleached calico, and fabric remnants from other projects for the appliqued letters (a good way to use up small scraps). My bag is 13" (33 cms) wide and 18" (46 cms) long, and I took these dimensions from a plastic bag containing 6 large bread rolls, that I had previously purchased at a Bakery.

Cutting the fabric


Cut two pieces of bag fabric, each 13" (33 cms) x 18" (46 cms)

Completing the applique

Find some alphabet letters to use. I used some from a pattern I already had, which was "I know my ABCs" by Kids Quilts, but I found this alphabet on an internet search:


Trace the letters in reverse onto vliesofix (a double sided glue backed with paper).


Choose the fabric you would like to use for each letter and iron the vliesofix onto the fabric, with the paper side next to the iron sole plate.


Cut out the letter with sharp scissors and use a pin to help with peeling the paper from the fabric, leaving the layer of glue attached to the fabric.


Measure up 7" (18 cm) from the bottom of the front bag piece and place the letters evenly there (I used a ruler to assist with lining their bases up) and then iron the letters down (it helps to do the placing and measuring on the ironing board, so you don't have to move the piece and risk dislodging the letters; this is the voice of experience!).


Blanket stitch around each letter. I used ordinary sewing thread in a matching colour, but you could use embroidery thread and/ or black thread.

A tutorial on doing blanket stitch can be found here (scroll down to the instructions for Sewing in from the edge): 

Sewing the bag


Sew down both sides of the bag and across the bottom, with right sides together, and then neaten with an over locker or zig-zag stitch.


Turn the bag right side out and measure across the width of the bag. Then cut  two pieces of fabric 2" (5 cms) wide and the length of the width of the bag plus 1" (2.5 cms) for the cord casing. It is nice to cut this from contrasting fabric that blends with the letters. Iron in the ends of each piece 1/2" (1.25 cms) and then iron the whole piece in half along its length.


Matching the beginnings and ends with the seams on the bag, sew the casing around the top of the bag, and over lock it to neaten. Using a tapestry needle, darn in the end of the over lock thread. Then iron the casing upwards.

Completing the bag


Cut two lengths of cord long enough to go right around the top of the bag, with added length for tying a knot, and thread each of these through from opposite sides of the bag (going right around the bag each time). A large safety pin is useful to use as a bodkin, and don't forget to tie the cord ends into knots after they have been threaded through.

Remember: Yesterday I was clever, so I wanted to change the world. Today I'm wise, so I'm changing myself. Rumi


Sunday, 30 June 2019

Lessons from the Red-gum Forests

Three years ago we began to follow the Murrumbidgee River, from its source way up in alpine country behind Kiandra, to where it joined the Murray River 1,500 river kilometres later. It took us four separate  journeys as there were lots of side tracks to follow.

We have just completed the final journey (from Narrandera to Delinquent and into Victoria), and this is the land of the lovely Red-gum Forests, which edge the River in Reserves and National Parks. And it is in exploring this land that  I learnt many lessons that remind me of the challenges of daily life and living in general.
These are the lessons I learned:

Just as no two trees are alike, we are all unique and individuals ...

... but together we make a forest of talents, skills and ways of being.

Hugs are good: we all need contact with others.

Time can heal wounds and wounds can help us to grow new characteristics .

It takes effort to break through.

We need to find ways around blockages.

New life is always possible, no matter how bad things seem.

Scars from the past may remain ...

... but we can cling on with the last of our strength and ability.

Too much of a good thing can kill us.

We can all reach for the sky and look upwards and outwards.

Remember: Being happy doesn't mean that everything is perfect, it's just you've decided to see life beyond the imperfections. Gratitude App.