Showing posts with label sewing. Show all posts

Monday, 8 March 2021

A gift package for the laundry

Last Christmas I made up laundry gift packages for my adult children and their partners, using the laundry bag and peg bag patterns I have covered in previous posts. 

This is how I did it:

First take one  Enamel Basin from Odgers and McClelland Exchange Store (I used mail order);


Then add a jar of homemade Wool Wash with the recipe;


A peg bag with some stainless steel pegs inside (to reduce plastic use);


A matching laundry bag:


Some hand knitted wash cloths;


And here is the completed package.


Another version:

In this one I used tractor prints for my son.


Remember: Sometimes when we don't have the courage to change, everything changes around us to direct us to a new path. Rhonda Byrne.


Tuesday, 2 March 2021

Bag of the month: laundry bag

The first laundry bag that I made was for an Aussie Service man or woman currently serving overseas, and more information and instructions can be found here:  Aussie Hero Quilts and Laundry Bags

I have subsequently used the same instructions to make a laundry bag for our caravan and bags for Christmas gifts, appliqueing "Laundry" to the gift bags as an additional touch.

Making the bag

This is how I went about sewing them:


After cutting out the front and back, I added a feature strip and applique to the front.


Then I sewed the side and bottom seams (right sides together), made a lining the same way, (but leaving a gap in the bottom seam for turning), and inserted the lining into the bag, right sides together.


The casing was inserted between the bag and the lining before sewing the bag and lining together around the top (with the bag inside out). I made hems on the ends of the pieces of casings before doing this (see below).


I then threaded through  thick piping cord and tied the ends together in a knot.


And ended up with this!

Other versions


Remember: Love and kindness are never wasted. They always make a difference. They bless the one who receives them, and they bless you, the giver. Barbara DeAngelis


Saturday, 16 January 2021

Bag of the month: Tote Bag/ Yarn Bag

This is a lovely versatile style that can be made in various sizes and used for various purposes. It is designed to fit comfortably over an arm -- thus the yarn bag versions that have been used for knitters whilst walking. I have also made it as a peg bag, as it also suits this purpose well.

I originally sourced a free pattern from Lorelei Jayne's "Yarn Bag Tutorial", which can be accessed here:   Yarn Bag

But then I decided to support Apple Green Cottage by purchasing their reasonably priced ALLina Tote Bag PDF Pattern, with much clearer instructions and two sizes to choose from, and it can be sourced here: Apple Green Cottage Tote Bag

This is my version of the smaller pattern, made into a bag to hold my embroidery cottons.


Finally, I drafted a pattern from http://masteraiumniki.blogspot.com/2018/08/blog-post_98.html , choosing the version with the wider handle for my peg bags.

This is how I sewed them together:


Cut out the outer and lining pieces and applique "Pegs" onto the front piece.


Sew the seams across the top of the handle on both the outside and lining pieces (I found this easier than the complicated instructions in the bought pattern, but my way may not work with a narrower handle).


With right sides together join and sew the outer and lining pieces around the sides of the handle.


Clip the curves and turn right side out.


Now join the side seams of the outer bag to the outer bag, and the lining to the lining. Sew across the bottoms of the outer piece and the lining, but leave a gap in the lining for turning.


Now box the bottom corners by pulling the side and bottom seams together and sewing across the gap.


Here is a closer view of the finished seam.


And here is a view of the side and bottom seams coming together before pinning and sewing.


Now turn the bag right side out through the gap in the lining. It will look like this. Sew the gap in the lining closed.


And finally pull the right side out through one of the side seams on the handle. I then chose to top stitch, close to the edge, around the handle openings to finish off.


Some other colourways.


A design feature after I accidentally cut this one along the fold line.


And yet another colourway -- this one had a bright pink lining.


This is the bag I made first with this pattern, and it is now my sewing notions bag.

Remember: If you believe it will work out, you'll see opportunities. If you believe it won't, you'll see obstacles. Wayne Dyer


Friday, 18 December 2020

Bag of the month: gift bags

 I purchased Christmas fabric on special in January this year, with the aim of making reusable fabric gift bags instead of using throw-away wrapping, and there the fabric sat in my cupboard until it was time now to wrap gifts. I had collected a few patterns and the one I had in mind, I could not find, so I ended up creating my own version. 

The method I used allows for custom fitting and suits awkward shapes.

This was the process:


Measure the width and length of the gift.


Cut out two pieces of fabric: the width of the gift plus ease, and the length plus extra to bunch and tie at the top later. I chose to add a contrasting stripe to the piece that would become the front of the bag.


Sew the two pieces together along the bottom and the two sides, and overlock for neatness as this bag will not be lined.


Sew a hem along the top edge.


Cut a generous length of ribbon and tie it around the top, adding a gift tag before tying the bow.


And here is the completed bag with gift enclosed.

Remember: What you leave behind is not engraved in stone monuments, but what is woven into the lives of others. Pericles


Thursday, 10 September 2020

Navigating the confusing world of home made masks

 There are now so many patterns and choices out there for masks, that it becomes quite confusing trying to decide which ones are best. I eventually settled on one from ithinksew as it fitted well and comfortably, gave an extra seal at the top with its unique design, had a pocket for a filter (so three layers), had adjustable ear elastic, and did not have a front seam (which could potentially allow leakage through the sewing lines).

Here is a link to the free pattern I chose:

Mask pattern

It includes a video tutorial, but no written instructions, so I have outlined the process below.


Cut out the pattern pieces -- an outer piece from tightly woven quilting cotton, and two inner pieces from a soft knit fabric (for comfort).


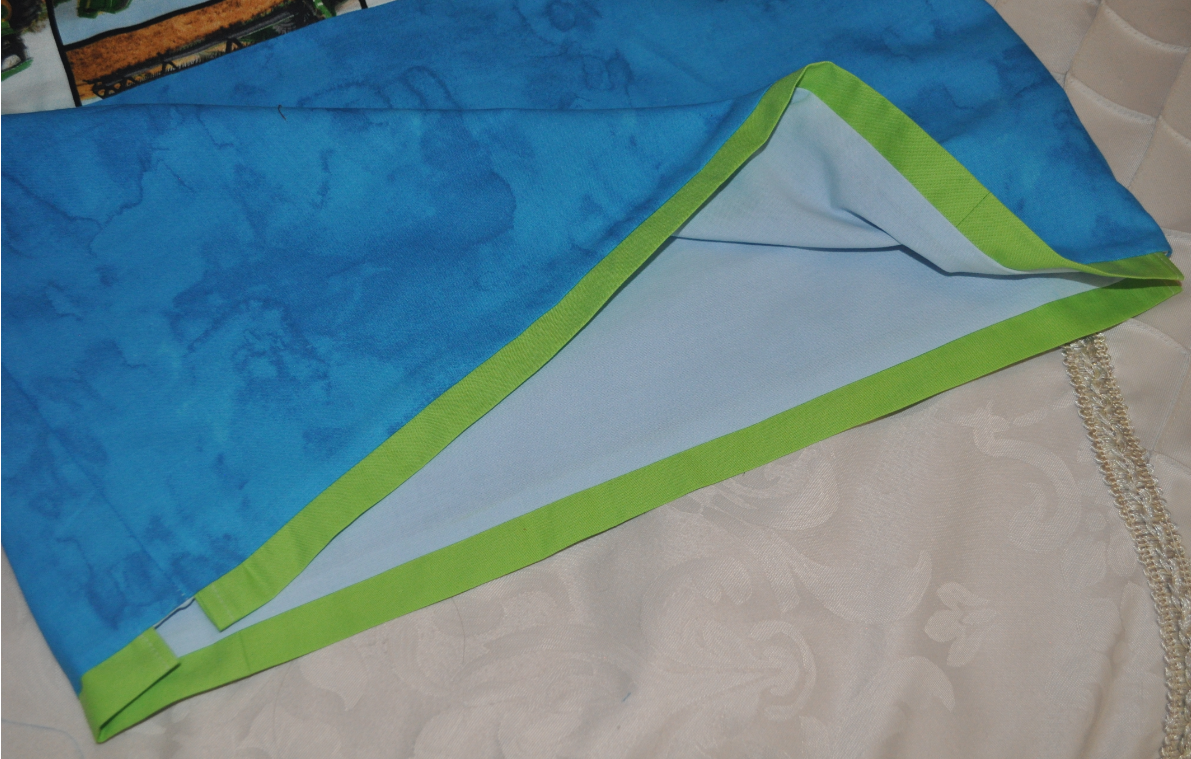
Join the two inner pieces together along the straight edges, leaving a 4 inch (10 cms) gap in the middle (this will be where the filter is inserted when the mask is finished).


Top stitch along both sides of the seam.


Sew the darts together on each of the pieces.


With right sides together, sew around the whole mask, then clip the corners and curves.


Turn right side out through the gap on the inside (the filter insertion gap) and iron.


Cut some wire about 4-5 inches long (10 -13 cms) for the nose area. I used a pipe cleaner as it moulds well around my nose, but I cut it 5-6 inches (13- 15 cms) long and twisted the ends in, so that there were no sharp ends to poke through the fabric. 

Then sew a casing at the top of the mask, the length of the wire, leaving one end open (unsewn).


Thread the wire into the casing and then sew the open end closed. I added some more stitching lines through the wire, a little in from each end, to hold the wire in place (it can tend to bunch up otherwise).


Cut two pieces of 3mm wide elastic, with each about  9 inches (23 cms) long (or maybe a little longer for a male), and thread a pony bead to the middle of each one. Then thread the two ends of the elastic onto a tapestry or darning needle and pull it through a bead with a slightly smaller hole. I used some blunt nosed jewellery pliers to assist with pulling. The hole in the pony bead is too big to hold the elastic secure when fitted around the ear, but is fine for the outer bead.


This is how it should look when completed.


Take one of the pieces of beaded elastic and lay one half of it it in the middle of a side flap, then fold the flap over and sew it down with the elastic inside. Knot the ends together and pull the knot inside the casing. Repeat on the other side of the mask.


Fold down the top of the mask, level with the tops of the side elastic casings, and top stitch right across.


Fold each side flap down to meet the edges of the elastic casings and sew down.


Insert the filter. A template is provided with the pattern. I have used Matilda's Own DIY Non-Woven Mask Filter inserts which come in a packet of A4 sized sheets. Filters can also be made from denim, layers of paper towel, and non-woven interfacing.

For my 95 year old mother, I sewed the denim directly to the inside of the backing fabric and cut the backing in one piece. Then I left one of the sides open where the elastic goes, so that it could be turned right side out and then closed when the casing was sewn down.


Remember: Sometimes you just need to relax and remind yourself that you're doing the best you can and everything is going to turn out just fine. Gratitude App.


And don't forget to wear your mask. It is a great way to encourage others to do so too, and to remind them to practice social distancing in the supermarket!


This is the view from our front verandah now -- very different to this time last year!